Convert Website to Android application – Here I share with you how to convert website to android application using android studio. Now a days most of peoples have android mobiles and they all like to use the app rather than desktop. So i have publish this article make simple way to access your website through android application.
Most of them still struggle to make an android application even college students also but here simply make android application within 15 minutes. Non-educated peoples also easily make the android app using android studio.
Actually website conversion is very easy but sometime we are facing some technical issues in web view concepts. So we are not recommending this way for most of peoples. However non technical peoples are go for this method to get their own android & iOS application.
Convert website to android application
Okay fine, Now we have start the work to make an android application. It’s very easy just follow my below steps to get a better results. Every developers has unique way to present the code but the output is same. So here we are using simple method concept code for retrieve the results.
Through the code you can easily convert your any type of website or WordPress blog into android application. And the results are like amazing with more features such as responsive results, user friendly navigation, error free actions and more.
1. First you have open Android Studio, suppose if you not have android studio just install now from android official site Android Studio.
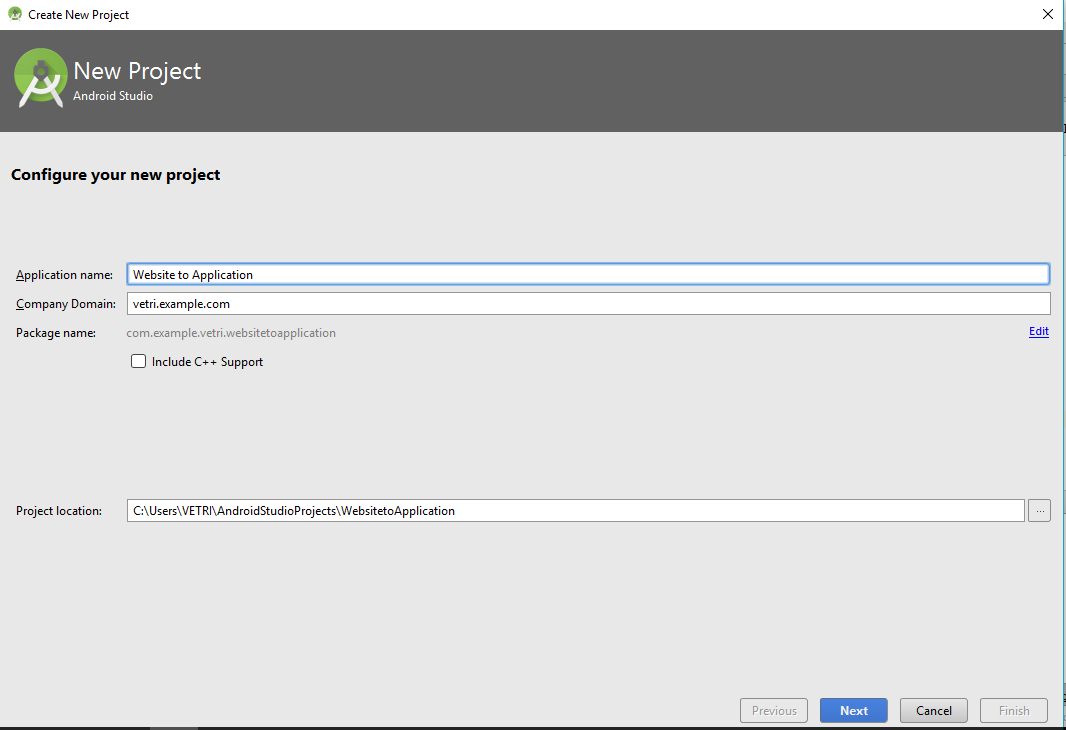
2. Then create new project in android studio & click Next (like below image)
3. Then click Next no changes (like below image)

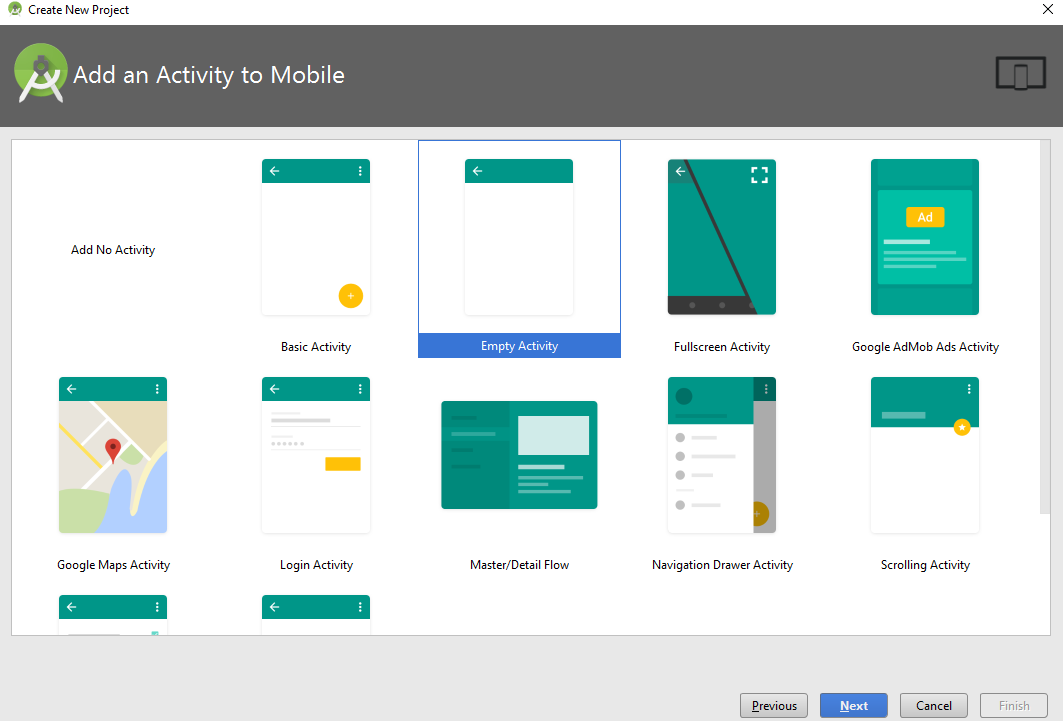
4. Hereafter, choose the Empty Activity, the click Next (like below image)
5. Then click Finish, no changes (like below imaage)
Now the project is successfully created. After creating project you will get this page (like below image)
Code Development
Now we are move on develop the simple code and get the android application. So just follow my steps to make an android application.
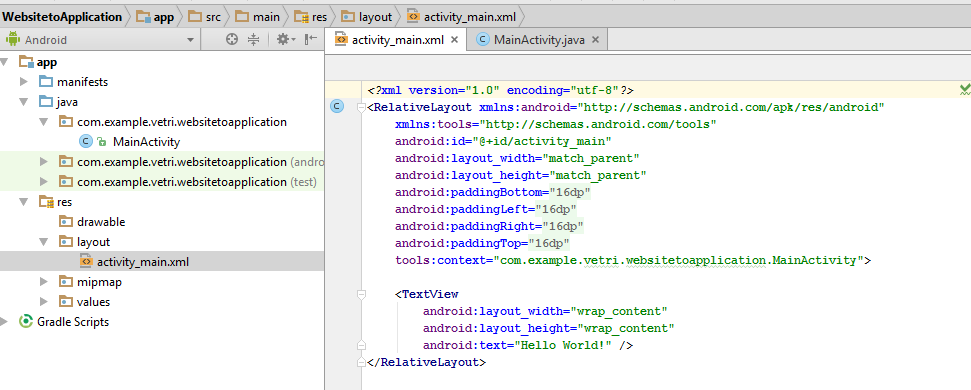
Open res->layout->activity_main.xml. now the activity_main.xml file will be opened (like below image)
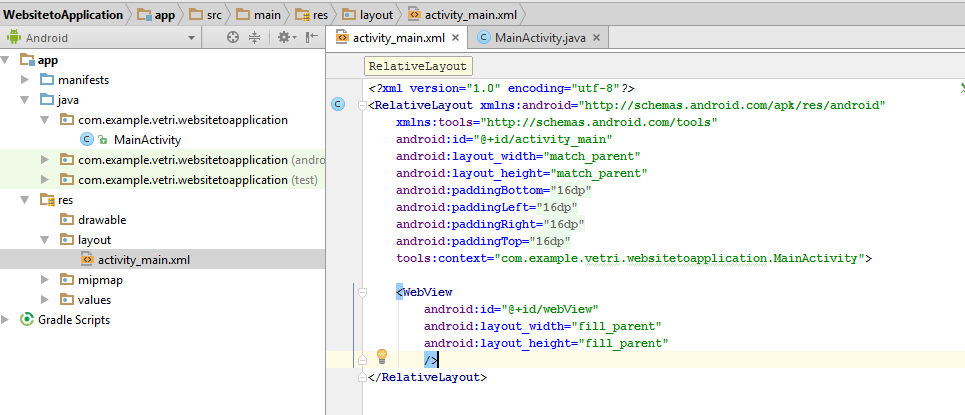
Then you are remove TextView tag and replace the below code. Finally the activity_main.xml file look (like below image)
Then move on MainActivity.java file
Just remove all content from MainActivity.java file and replace the below code. Remove the http://vetbossel.in website and replace your website name in that place.
package com.example.vetri.websitetoapplication;

import android.graphics.Bitmap;
import android.support.v7.app.AppCompatActivity;
import android.os.Bundle;
import android.webkit.WebView;
import android.webkit.WebViewClient;

public class MainActivity extends AppCompatActivity {

    private WebView webView;
    @Override
    protected void onCreate(Bundle savedInstanceState) {
        super.onCreate(savedInstanceState);
        setContentView(R.layout.activity_main);

        webView = (WebView) findViewById(R.id.webView);
        webView.setWebViewClient(new myWebClient());
        webView.getSettings().setJavaScriptEnabled(true);
        webView.loadUrl("http://vetbossel.in");

    }

    public class myWebClient extends WebViewClient
    {
        @Override
        public void onPageStarted(WebView view, String url, Bitmap favicon) {
            super.onPageStarted(view, url, favicon);
        }

        @Override
        public boolean shouldOverrideUrlLoading(WebView view, String url) {

            view.loadUrl(url);
            return true;

        }
    }

    @Override
    // This method is used to detect back button
    public void onBackPressed() {
        if(webView.canGoBack()) {
            webView.goBack();
        } else {
            // Let the system handle the back button
            super.onBackPressed();
        }
    }
}
Add Internet Permission
Then go on manifest->AndroidManifest.xml. The codes looks (like below image)
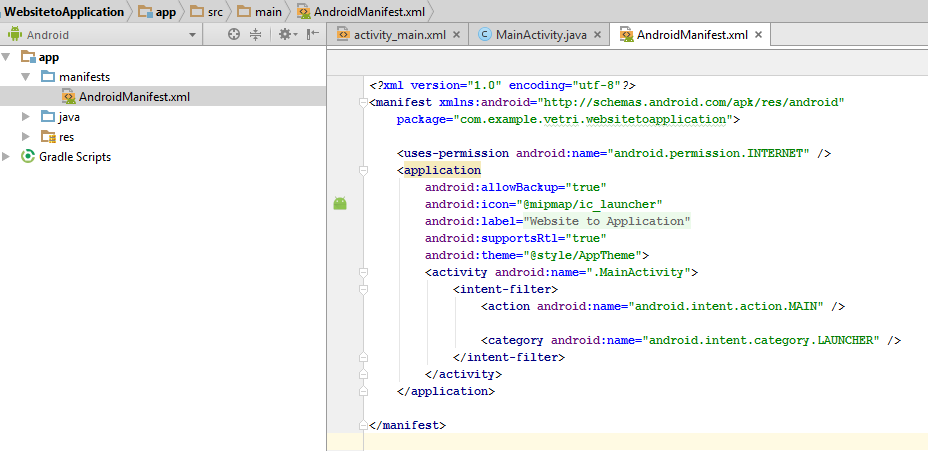
Now, we have added the internet connection code in AndroidManifest.xml. So we are full permit to access the internet connection. If you have any doubts regarding this just comment below we will try to solve your issues within a days.
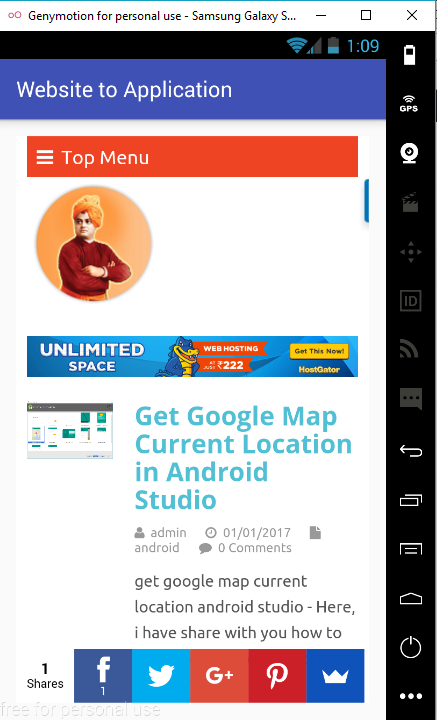
Convert Website to Android Application
Now you have to run your application in android emulator. The exact output looks (like below image)
Read more Get Google Map current location.